
As a homeowner, maintaining the beauty and longevity of your deck is essential. However, the process of staining a deck can often feel daunting and time-consuming, leading many DIY enthusiasts to hesitate or seek professional assistance.
But fear not! In this discussion, we will uncover simplified techniques that will make deck staining a breeze for even the most novice DIYers. From choosing the right stain to troubleshooting common issues, we will provide you with valuable insights and expert tips that will leave your deck looking stunning and well-protected.
So, whether you're a seasoned DIY enthusiast or just starting your home improvement journey, get ready to unlock the secrets of deck staining made easy.
When selecting the appropriate stain for your deck, it is crucial to consider factors such as the desired aesthetic, durability, and compatibility with the wood type. The aesthetic aspect involves deciding on the color and finish that will complement the overall look of your outdoor space.
Durability is an important consideration as you want the stain to protect the wood from the elements and maintain its appearance for an extended period. Additionally, it is essential to ensure that the stain is compatible with the type of wood used for your deck.
Different wood species have varying characteristics, and using the wrong stain can result in poor adhesion and uneven color. By carefully considering these factors, you can choose a stain that not only enhances the beauty of your deck but also provides long-lasting protection.
Before applying the stain to your deck, it is essential to properly prepare the surface to ensure optimal adhesion and long-lasting results. Preparing your deck for staining involves several important steps.
First, thoroughly clean the deck to remove any dirt, debris, or mildew that may be present. This can be done using a pressure washer or a deck cleaner and a stiff-bristle brush. Next, inspect the deck for any loose or damaged boards, and repair or replace them as necessary.
Sanding the deck is also crucial to smooth out any rough patches or splinters and promote better stain absorption. Finally, ensure that the deck is completely dry before proceeding with the staining process. Taking the time to prepare your deck properly will result in a more professional-looking finish and enhance the longevity of the stain.

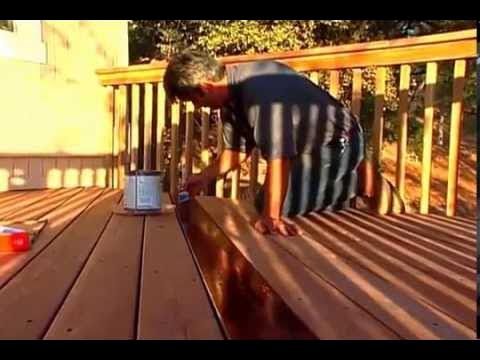
To achieve a professional-looking finish, the next step in deck staining is the application of the stain. Before starting, it is important to choose the right type of stain for your deck, considering factors such as color, transparency, and durability.
Begin by thoroughly mixing the stain to ensure a consistent color throughout. Using a brush, roller, or sprayer, apply the stain evenly in smooth, overlapping strokes, working in small sections at a time.
Be careful not to apply too much stain, as it can lead to an uneven finish or pooling. Pay special attention to areas that receive more wear and tear, such as steps and handrails. Allow the stain to dry completely according to the manufacturer's instructions before walking on or using the deck.
Now that you have successfully applied the stain to your deck, it is essential to implement proper maintenance and protection techniques to ensure its longevity and appearance. Regular maintenance is key to preserving the beauty and durability of your stained deck. Start by regularly cleaning the deck surface to remove dirt, debris, and mildew.
Use a mild detergent and a soft brush or broom to gently scrub the surface. Avoid using harsh chemicals or abrasive cleaners that can damage the stain. Additionally, inspect your deck regularly for any signs of wear or damage.
Address any issues promptly to prevent further deterioration. Lastly, consider applying a protective sealant every few years to enhance the stain's durability and protect against UV rays and moisture. By following these maintenance and protection techniques, you can enjoy a beautiful and long-lasting stained deck for years to come.

To further enhance the functionality and security of a deck, attention should be given to improving safety and traction. A well-maintained deck should provide a safe and stable surface for walking, especially in wet or slippery conditions.
Staining the deck can help improve traction by adding texture to the surface. Many deck stains contain additives, such as silica or rubber particles, which create a non-slip surface. These additives help to increase grip and reduce the risk of accidents, particularly in areas prone to moisture or where children or elderly individuals may be present.
By improving safety and traction, deck staining not only enhances the overall aesthetic appeal but also ensures a secure and stable environment for all deck users.
One of the challenges that may arise during the deck staining process is troubleshooting common staining issues. Despite careful preparation and execution, homeowners may encounter problems such as uneven color application, blotchiness, or peeling. Uneven color application can occur due to factors like improper mixing of the stain or inconsistent application techniques.
To fix this issue, homeowners can try reapplying the stain using a brush or roller, ensuring they follow the manufacturer's instructions for even coverage. Blotchiness, on the other hand, can be caused by wood absorption variations or inadequate surface preparation. To rectify this, homeowners can sand the affected areas and apply a second coat of stain.
Lastly, peeling may result from inadequate surface cleaning or using an incompatible stain. In such cases, homeowners should strip the old stain, clean the surface thoroughly, and apply a new coat using a compatible stain. By troubleshooting these common staining issues, homeowners can achieve a beautifully stained deck that enhances the overall aesthetic of their outdoor space.
Yes, it is possible to stain a deck that has previously been painted. However, it is important to note that the paint will need to be completely removed before applying the stain. This can be done through sanding or using a paint stripper. Once the old paint has been removed, the deck can be properly cleaned and prepped before applying the stain. It is recommended to consult with a professional or follow manufacturer instructions for the best results.
Using a pressure washer to clean a stained deck is a topic of interest among DIY enthusiasts. While pressure washers can be an effective tool for removing dirt and debris, it's important to exercise caution. High water pressure can strip away the stain or damage the wood if not used properly. Before using a pressure washer, it's recommended to test it on a small, inconspicuous area to ensure it doesn't cause any unwanted effects. Additionally, following manufacturer guidelines and using the appropriate nozzle and pressure settings is crucial for achieving desired results.
It is not always necessary to sand a deck before staining it. However, sanding can help to remove any existing stain or paint, smooth out rough spots, and ensure better adhesion of the new stain. It is recommended to inspect the deck and assess its condition before deciding whether sanding is required. Factors such as the type of wood, previous finishes, and the desired outcome can also influence the decision to sand or not.